
The Kwiky all Fuel Burner
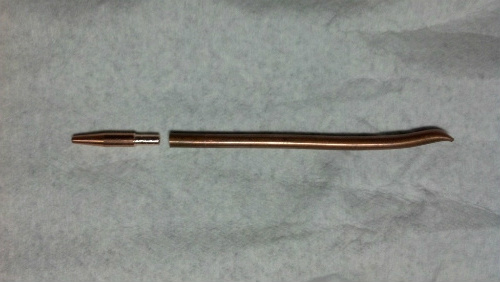
Disclaimer: I am not an engineer...and while this has worked well for me, I can't be responsible for how you put it together and use it... use this information at your own risk! I have put this out in the public domain...but I would appreciate (and expect) your linking back to this page when you build one! Send me a picture or video and I will post it here too. There are only 6 parts that make up the burner assembly.... plus the plumbing to get the fuel there and to regulate it. Here is a picture of the parts needed to build this burner:
1/8 Plug
blue links are clickable for more information
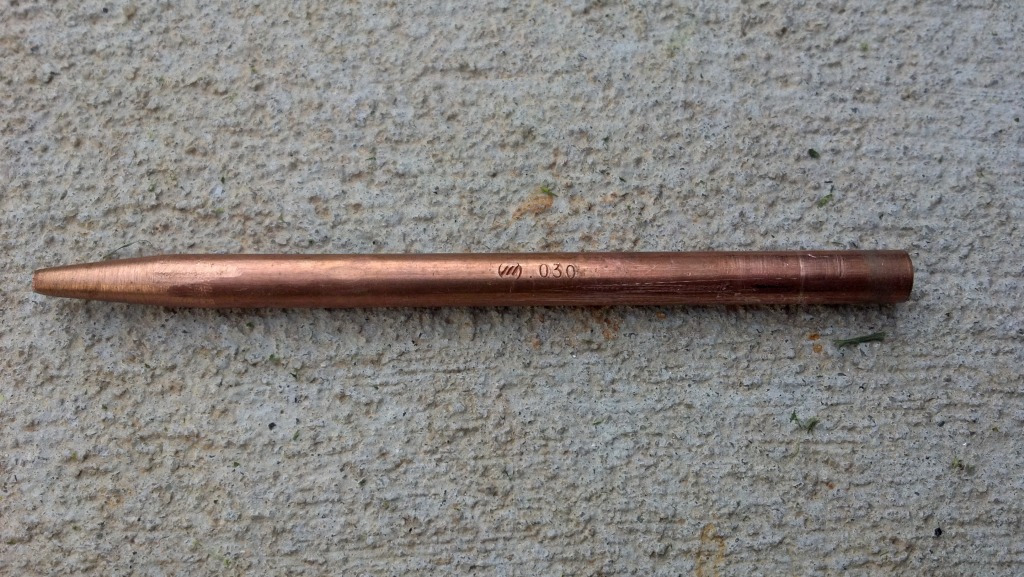
Here is a close up of the mig welder tip and the 1/4 inch OD copper tube. This mig tip is for .025 wire. I filed the threads down on the mig tip so that it fits snuggly into the end of the tube. You could turn it down on a lathe if you have one, or just put it in a drill and file it down like I did. You need to sharpen the tip...I use a drill and file. If you want to skip this step and cut down on another part needed, you can use a long mig tip instead for this step. The second picture is of that mig tip.
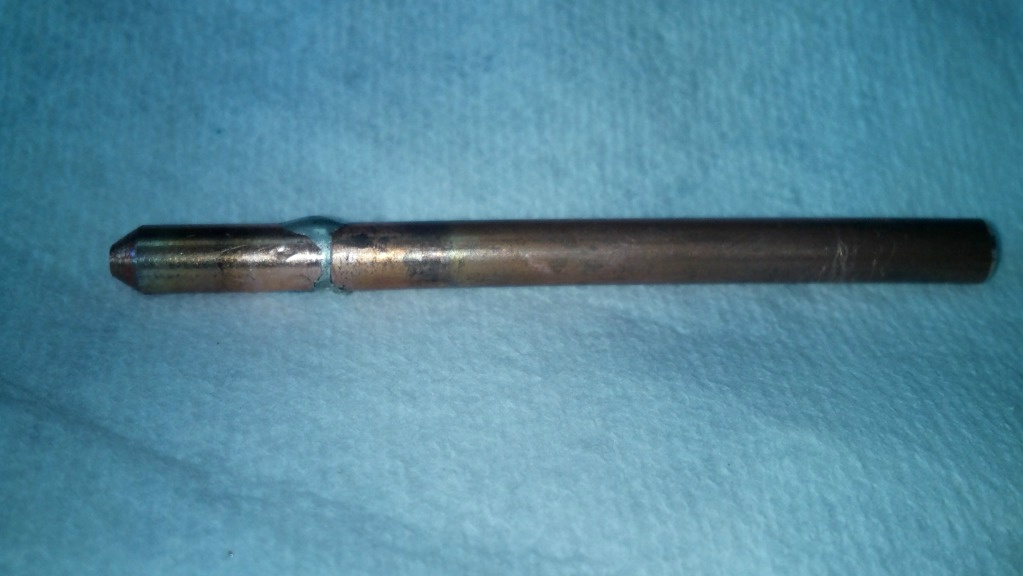
The tip gets silver soldered into the 1/4 inch OD supply tube. so it looks like the picture below.
The tube and tip need to be filed smooth so that they will slide into the 1/8 inch brass plumbing nipple...2 inch long. I used my drill for that too!
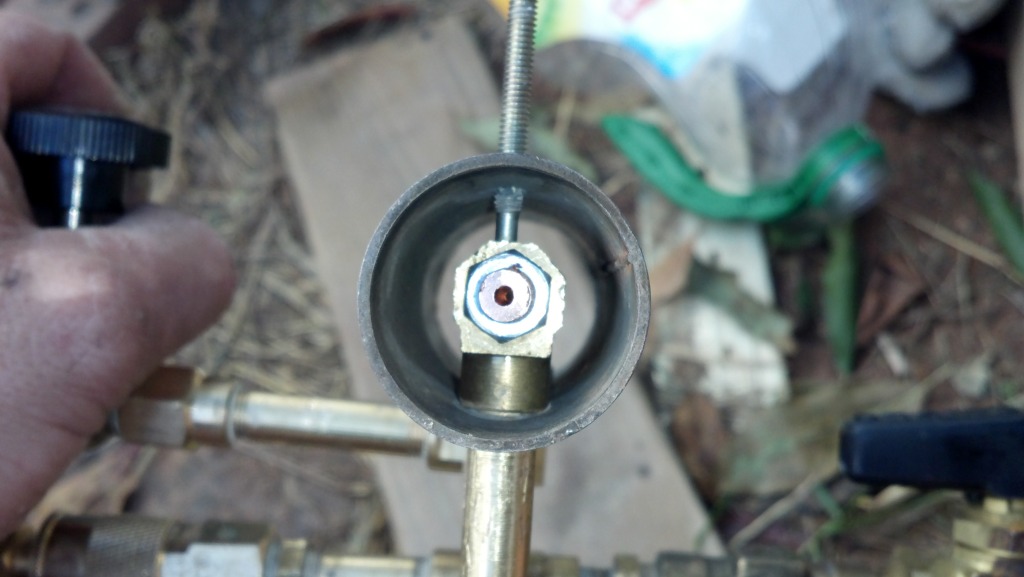
Thread the plug into the T fitting as tight as it goes and push the air supply tube...with the mig tip soldered onto the 1/4 inch tube...in through the pipe until it stops when it hits the back of the plug. Solder the 1/4 inch tube at the back...being careful not to get solder on the threads.
Cut off the tube flush with the end of the pipe so that the 1/8 X 1/8 elbow can be screwed on. Now, hook up your air supply to the back fitting and a cutoff valve and supply tube to the fuel line. (front)
With the fuel tube in water, turn on your air and fully open your fuel/ water supply. Turn the plug out and adjust your air so that you are getting a good spray at 30 lbs of pressure.
My burner tube is very small so the fittings are tight against the bottom of the tube when installed. I tapped a 8/32 thread in the top side to install a bolt to keep the front of the burner tight. If your tube is bigger, you will need to figure out spacers to center it. If you want to run it outside of your furnace, you probably want to use at least a 2-3 inch diameter pipe.
Here is what the front of my burner looks like: To the left, is my oil supply valve and to the right is my air cut off...which is probably not necessary. I ran my supply tubes out the bottom and I think I may redo them so that they go out the side so that any drips will go into the furnace and not out on the ground.
When the burner is hooked up to the furnace, I can light the kerosene using just a propane torch. I set the air regulator to 30 and then turn on the kerosene supply. It easily lights with the propane torch. The idea is to switch to oil when the furnace is nice and hot....which only takes a minute or two. I have been using a small blower too.
Let me know if anything is not clear in these directions...or if you are having a hard time finding the parts you need. A welding supply place should have the mig tips. The short ones are a lot more common and can be found at home depot and lowes, tractor farm supply etc. If they aren't the tapered ones, they can be tapered easily...I use my drill and a file to do it! (see video below) Here is a video of the burner build...from start to first burn.
This video gives a more detailed build
ADDITIONAL TIPS: Some people have suggested varoius ways to get the burner to run easier on oil. 1: Thin your oil with kerosene or diesel 2: Heat up your fuel 3: Raise up your fuel container. This will give the fuel "head pressure" 4: pressurize your fuel tank. I have seen people use a small aquarium air pump to do this or use your air compressor. It only needs a small amount of pressure to make it work...and it won't use much air. My compressor has two outlets so I am thinking I will make fuel container using a propane tank and a regulator. I haven't had time to make that happen yet though.sign my guest book below and sign up for my metal casting e-zine...it's free!... the guest book is public and you don't have to input all your information...but first name and location would be nice!
Or leave a message in the chat box below...If you input a website, it will go to it if someone clicks on your name.
Before you go, check out Harbour Freight...They have some great deals...I was looking at the air compressors...If you need a good one for the burner, you can find it here!
Click here to see other variations on this design and also other peoples builds
